The Crane Forest Project
- BLENDER - UNITY - ILLUSTRATOR -
Planning
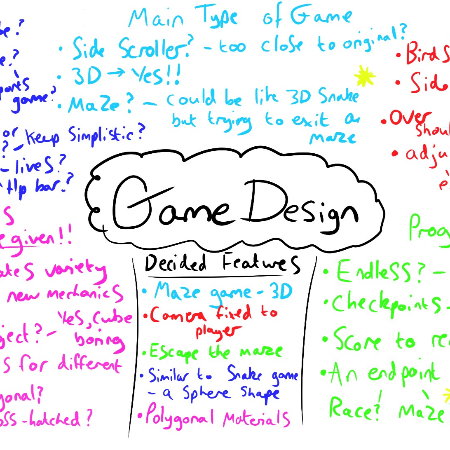
We started planning the game with a brainstorming session between us thinking of all the potential areas of climate issues that we could cover within our game, which then led to discussing our different ideas and voting on which we would choose as our main idea. After this, we then compiled the best parts of the other ideas into our main idea to bring the best of our minds together. We then had to decide on what style we wanted the game to have and started to outline the mechanics that would be featured inside it. This is where the group split off into different parts of the project, the design students in my group had to plan the 2D and 3D designs of the different assets for the game and their colour boards too, whereas the 3D students – including me – had to begin playing around with blender and starting to get ready to bring the 3D designs to life so they could be added to the soon-to-be created unity file.
Design Process
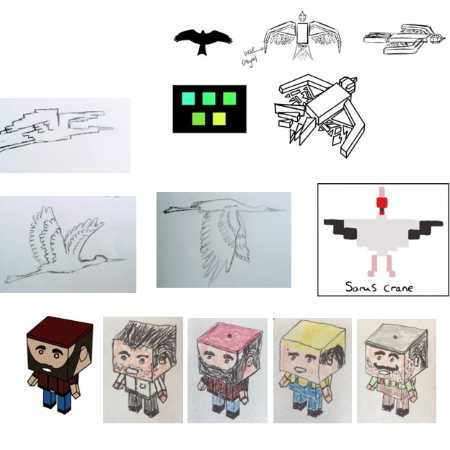
The design students began designing the assets with simple sketches in 2D that were very rough and quick, and from there we decided as a group where to go from there with the designs and whether they were right or not. After this, they went back and drew out the new and improved versions of the assets with more detail and more time invested, we came back together again and we really liked the designs that we had made. So we all went straight into drawing them out one last time, but this time in 3D with the topology in mind through use Of lines within the assets to show the faces, edges and verticies throughout the shapes. This took longer as we wanted to perfect the design for the 3D modelling as early as possible to avoid modelling issues further up the line when actually in the middle of it’s creation in blender.
Stages of Asset Creation
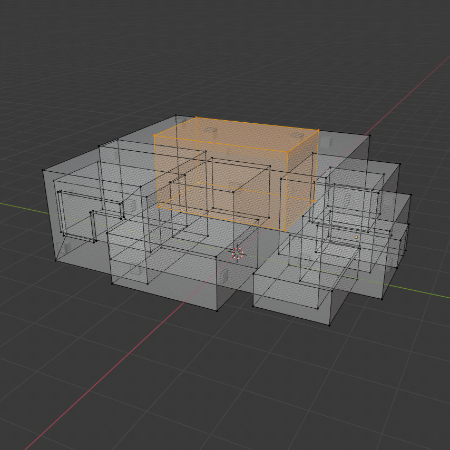
To get from the original 3D model designs all the way to the final products, it took several stages of 3D development to do so. Firstly, was creating the base meshes for each asset, to do so I had to use the right pre-made meshes that were closest in shape to the different parts of the assets and position them near their correct placements for a rough view of the right sizings and direction Of the asset shape. Next came the switching to edit mode and appending/emending the verticies of the meshes before bringing a bunch of different tools into use such as; loop cuts for dividing faces into correctly proportionate areas, insetting faces for creating faces within a face, extruding faces for creating new 3D mesh out of other already existing faces and the knife tool to create new topology easily across the meshes. Once the assets’ meshes were combined together appropriately, the UV unwrapping began where I prepared the whole assets for textures to easily be added in the next stage by creating a UV map which textures can overlay onto in an easily understandable display. The final stage as previously mentioned is creating and adding the textures into the UV maps so that the assets have their finer details and colours sorted.
Sculpting and Rigging
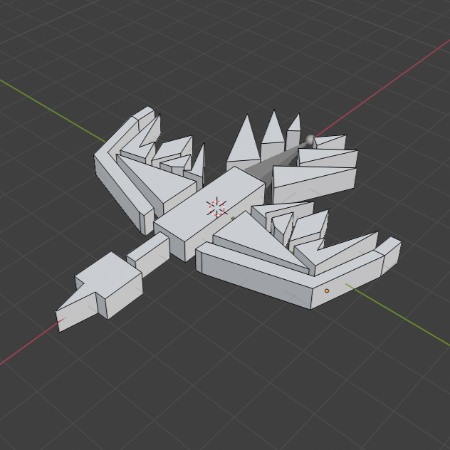
Sculpting the different assets in this project was made a lot easier by the art direction we chose of the heavily cube and polygonal style, and so after creating the first asset it was easier to transfer that skill into the other assets after it as they were all shaped in a similar direction. The design members of my group put together well detailed sketches of what the different assets and characters would look like and using these as reference I began to create the models from the basic shaped meshes into their different shapes.
The model I will delve into creation and rigging wise is the main character ‘The Crane’. The design was researched by looking online at pictures of a specific crane, the Sarus crane, and then using their shape and colour scheme to create 3D mesh designs for the 3D students to base their work off. This helped us create a clear image straight off the bat of what we were looking to make, and so with this I began to add and append multiple cube meshes, to create the rough shape of the bird’s design, and then from there sculpt them with tools on the editing tab such as; move, rotate, resize, loop cut and the knife tool. Using all these tools I was able to sculpt the meshes into the correct positioning and shapes for the model to match the design to the right degree. Once this was completed, as a group we gave feedback for the model and decided a few tweaks to it that we all liked and then it was finalised ready for the next step, rigging.
Rigging the bird was not too complicated as, bearing in mind the young audience and the simplicity of the game, the animation would follow that level of simplicity so realistically we only needed the bird to flap its wings very straight up and down. To do this I had to create the armature with several different bone groups, the main spine, the tail, the head, the right wing and the left wing. After creating and categorising these bone groups, I selected them all, right clicked and went to parent > armature deform > with automatic weights, and then the armature was complete and ready for posing for the animation. This involved creating keyframes on a timeline and altering the position of the wings over these keyframes to create a fluid flying animation. I used around 30 keyframes within 120 frames to do this, and only slightly changed the positioning of the wings throughout, however when the wings were at their highest and lowest, they were there for longer to present an illusion of weight and force being applied when flapping against the air.
Exporting
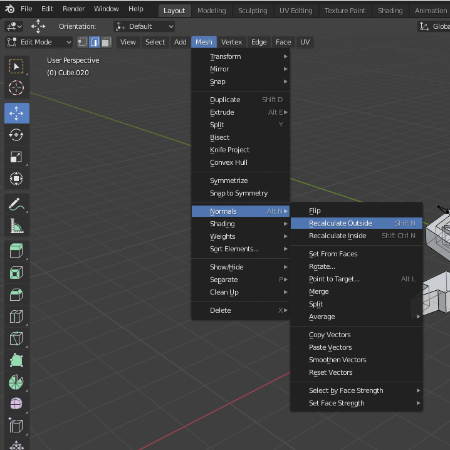
Exporting the assets and characters from blender to be placed into our project unity file involved firstly making sure all the different creations would import correctly with all their faces and polys correctly placed. To do this, on every asset before saving and importing I would select all, go to mesh > normal > recalculate outside and I did this as I found that it was an appropriate fix for any mesh errors that occurred over importing, and in addition to this I also removed any cameras and lights as they would conflict with those in the unity file. Once this was sorted, I would load up the unity file for the game project, and in the project files section at the bottom of the screen in the assets window I would drag in the .blend files and they would be added to the scene ready for placement and coding.
The Daisy-Mae
Project
- BLENDER - ILLUSTRATOR -
Weeks 1 to 4
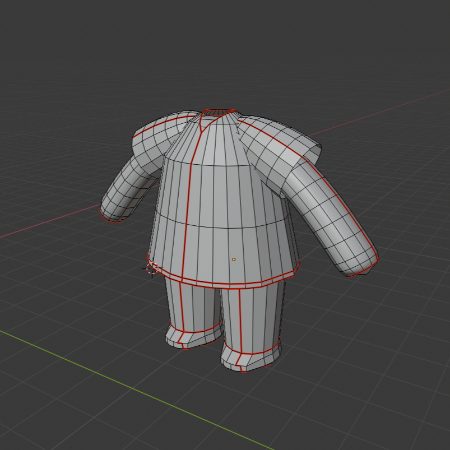
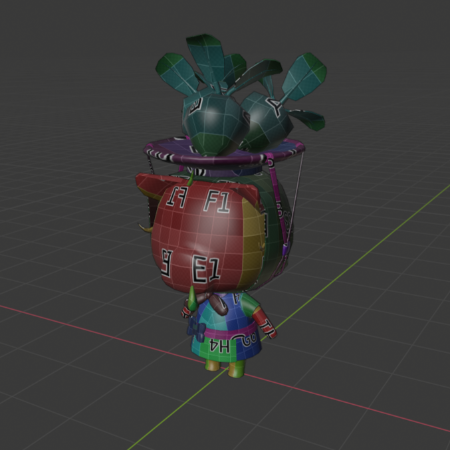
In the first third of the semester, we discussed a large amount about the different types of 3d software, and the features that these software had for us to play around with and figure out, and we also talked about animation, with its most common use being in the games industry. This enabled us to get an idea of what we would be exploring as time went on, and how we might be going about things with our own work too. In addition to this, we also got into the basics of blender and Unity, and tested out the distinctive features we had discussed and got slowly into the swing of things, trying out modelling meshes for assets like swords, and axes, and in our own time choosing some of our own assets and creating them. I chose to create multiple assets, one being a simplistic sewer cover, another being a crushed water bottle and my final one being a pile of assorted rubbish. I used different tools that I learned about like, for example, ‘inset faces’ to create the rim of the sewer cover, ready to lower in the middle with the ‘extrude tool’ to create depth in the asset and make it feel like the real thing. The last thing we got to doing, just as we neared the fifth week was getting into small groups and starting to model parts of the animal crossing character which grew to be our main weekly-task-project throughout the semester, and so in these groups we each had to make our own piece of the character, I chose to model the body of the character and so using my recently gained 3d modelling knowledge, I combined use of all the features I knew about to create a near exact copy which I was pretty happy with. We then combined our parts together in class to create a whole modelled character altogether, and shared with the class our results.
Weeks 5 to 8
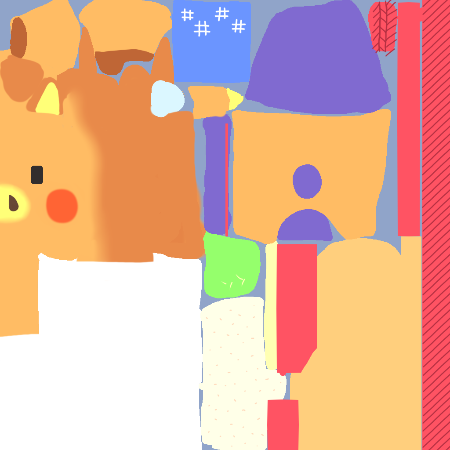
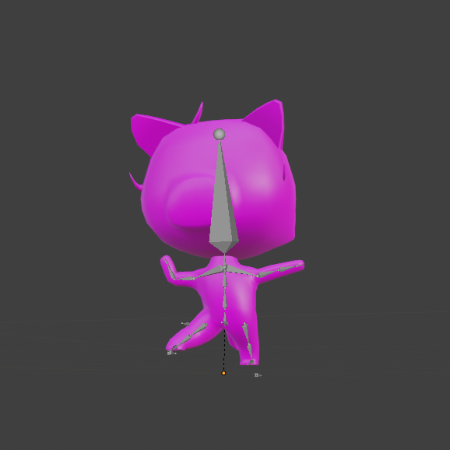
In the second third of the semester, we focused on getting a large amount of practical work done, with group discussion as we progressed on the side and this allowed for a much deeper dive into blender and unity, allowing my work on Daisy-Mae, the Animal Crossing character, to grow and develop to a well-made late-stage character model with full UV mapping and texturing. We started off with a group discussion on how to create a UV map/texture correctly and incorrectly for a character model, and what the best ways to do so were. We jumped straight into unwrapping the mesh of our Daisy-Mae model, and looking at the various parts, and where detail and colouring would be added as a texture. To do this, we performed a live unwrap after selecting all the mesh in the blender file, and then choosing UV and live unwrap. This gave us a 2D layout of the complete Daisy-Mae mesh, with all the limbs, the body, the head, and the clothing separated for texturing. After doing so, we placed a temporary mathematically perfect texture over the models unwrapped mesh which allowed us to see where we would have to colour and blend due to parts of the mesh overlapping when in it’s 3D form again. After getting the right idea and colouring the mesh properly, I saved it in the blender file and when inspecting the model in its 3d model, it had the texture correctly placed and the fully textured model of Daisy-Mae was finished ready for its final few stages. During week 8, we began to touch on the rigging of the Daisy-Mae armature ready for posing and animation. At this point, I started on creating the bone armature in blender within the Daisy-Mae file to perfectly shape the armature to fit in the character model, with the right bones in their right places. For this, I used a common naming convention to group the bones up into their correct groups with each bone having the appropriate name. Some examples of this includes; upperarm.l, lowerarm.r and pelvis. In these examples, the naming convention utilised having a .r or .l at the end, this was to group the bones into their correct side of the body, be it they were on the right or the left side. these bones connected to each other mirroring that of a human body as that is how the character body is shaped and made like, and so I had a full skeletal system ready for further steps of rigging.
Weeks 9 to 12
In the final third of the semester, we wrapped up our Daisy-Mae modelling projects by finishing the rigging and animation of the character. This was mainly what we did for the rest of this project due to spending more time on creating the portfolio website for all work to be uploaded to. Diving straight back in, the next step to rigging my Daisy-Mae model was creating extra bones separate from the spine where the joints would bend. This involved yet another naming convention as these bones use a 3D process called inverse kinematics (IK) which allows for desirable positioning of the limbs when it comes to posing. these IK bones would be named similarly to iklegpole.r to point as to where they belong outside of the skeleton. Once connected, these IK poles were then ready to be used in blenders posing mode to position the character around differently. After playing around with the posing mode for some time, I was prepared to start the final stage of the 3D character creation and this was the animation. To do this, I had to utilise blender’s built-in timeline to position the character to look like it was walking over a period in a loop, and this would create a walking cycle. Every 4 frames, I would create a new keyframe and then slightly alter the legs, arms and even slightly tilt the head of the character, and I did this over 90-120 frames to create the smooth animation, so with this finished, my Animal Crossing character creation was completed, and my project was at an end.
Looking Back
To conclude this project, I believe that I have progressed massively throughout the 12 weeks (about 3 months), in terms of my level of skill and my understanding of many tools and methods used within the 3D industry to create anything. Although this project was only about a character creation, the skills and tips I picked up will be flexible in whatever I do down the line and so this project has gotten me far. My animal crossing character creation was a success, and my next project will look even better than it without a doubt. I’ve found that my strengths lie mainly with modelling in blender and creating 3d assets and characters as I understand how to use all the tools well and have picked up some tricks to make it easier too. My main weakness is that I struggle mostly with the texture creation as I sometimes do not unwrap the meshes properly and raises problems for progressing any further. Overall, I would say that this project was a big success.